Offense
Every offensive play starts on the play-call screen: pick a formation, then a play. The 25-second play clock starts at the whistle and runs while you choose and line up. If it runs out before the snap, you get a 5-yard delay of game penalty. A timeout resets it to 25.
Calling a play
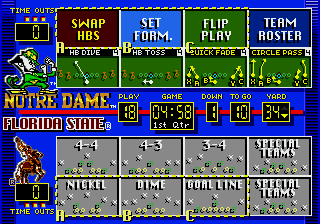
- SWAP HBS: send in your second halfback Elevated
- SET FORM.: back to the formations Elevated
- FLIP PLAY: mirror the play Elevated
- The plays of the formation you picked, with their diagrams
Move the three boxes (marked A, B and C) with the D-pad. Press the button of the box that is over the formation you want. The plays of that formation appear; pick one the same way. Scroll up to reach the top row of tiles.
Play Call mode (pause menu): 3 Box is the default, described above. 1 Box has one box, for playing against someone on the same screen: C picks, and B makes a fake pick that sounds the same, so the other player can't tell which play you picked. You can pick more than once; only the last real pick counts. Press A to leave the play-call screen when you're done.
The top row Elevated:
- SWAP HBS puts your second halfback (HB2) in for your starter, or back. He stays in until you swap back, and plays with his own ratings, energy, jersey number and stats. Halftime and the start of a game put the starters back. Kicks, punts and field goals always use the starters. On a 6-button pad, Z does the same from anywhere on the play-call screen.
- SET FORM. goes back to the formations. Y 6-button does it too.
- FLIP PLAY mirrors the formation, every assignment and the play diagrams, and the tile turns yellow. Pick it again to flip back. X 6-button does it too.
- SWAP WR1/2 Elevated trades your two starting receivers, the split end (SE) and the flanker (FL), on every play, and the tile turns yellow. Pick it again to swap them back. It holds for the whole game, halftime included. Kicks, punts and field goals don't change. There is no button for it. It works together with SWAP HBS. This tile used to be TEAM ROSTER: Team Rosters is on the pause menu (chapter 9), and the defense's play-call screen still has its tile.
Timeouts are on the pause menu (chapter 9).
The formations
The first two rows are new in Elevated Elevated: Singleback, SB 3WR, SB 4WR, Pistol and 4 WR, Empty, Trips, Shotgun 2RB, with plays adapted from Madden NFL 97. The original formations follow: Shotgun, I-Form, Pro Form, Near, Far, Veer, Wishbone, and the special teams. Many of them have extra rows with 67 plays from College Football USA 97 Elevated. The Shotgun also has two new plays Elevated:
- RPO: the quarterback keeps the ball and rolls out right to pass. If you press B within about a second of the snap, he pitches to the halfback instead.
- HB SWING: the halfback runs across in front of the quarterback, then up the sideline.
Speed option Elevated: SINGLEBACK, TRIPS, SB 4WR, 4 WR and SHOTGUN 2RB each have a SPEED OPT. play (in place of an HB toss or trap). The quarterback runs the option to the right with the halfback as the pitch man; with Flip Play it goes left. Your quarterback keeps the ball unless you press C, which pitches. A CPU quarterback pitches about half the time.
Option sweeps Elevated: NEAR's HB TS. SWEEP and FAR's HB TOSS SWP. run the same way as before, but they are options now: the quarterback keeps the ball unless you press C to pitch.
Flip Play keeps the offensive line on its side Elevated: the backs and receivers swap sides, and the five linemen stay where they are and block the mirrored play.
Before the snap
| C | Snap the ball | |
| B | Hard count: a fake snap call that can draw the defense offside | |
| A | Audible: open the menu, then A, B or C for one of your three audibles | |
| A, thenX | Flip the play at the line: everyone runs to his mirrored spot | Elevated 6-button |
| or | Pick a back or receiver to send in motion; a marker shows under him | Elevated |
| or | Send him in motion; press the other way to bring him back | Elevated |
| Z | Hold: energy bars over every player | Elevated 6-button |
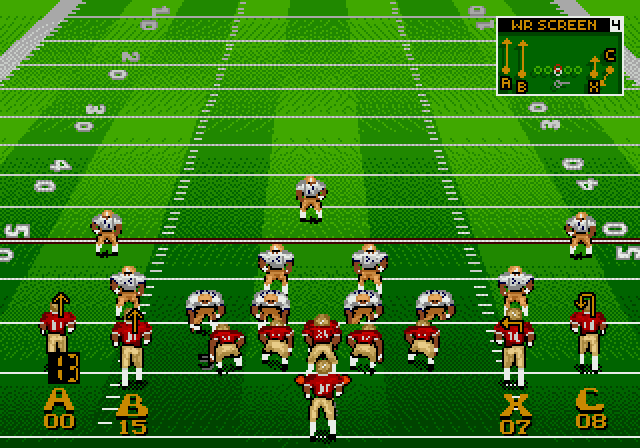
| X | Hold: each receiver’s button, jersey number and route above his head, and the play’s diagram | Elevated 6-button |
| Y | Hot route menu (pass plays) | Elevated 6-button |
Motion Elevated: press toward the middle of the field and he goes in motion across the formation. Press toward the sideline and he takes a short motion toward it. Defenders in man coverage follow him. The last player on the line (a tight end or split end) can also go in motion, if a receiver who is off the line on his side can step up to take his place.
More motions Elevated:
- A back goes out to the slot on the side you press: up to the slot's depth first, then over (a small step aside first if the quarterback or another back is in his way). If a receiver already stands in the slot, the back goes to the wing, just outside the tight end or tackle. If both are taken, he takes the short motion.
- The I-Form fullback takes a short shift to the side you press, at his depth.
- A tight end on the line sent toward the sideline goes to the slot on his side, and the receiver outside him steps up to the line.
- Several motions in a row: once the man in motion has stopped (at the end of his motion, or back on his spot), up and down pick the next man, or the same one again. Only one man moves at a time.
- Goal Line and Tee formations have no motion, and the ball carrier can't go in motion.
Audibles: when you don't like what the defense shows, change the play at the line. Press A, then the button of the audible you want, then C to snap. Each team has three; set yours in the pregame or on the pause menu (chapter 4).
Hot routes
6-button Elevated Before the snap on a pass play, you can change one receiver's route:
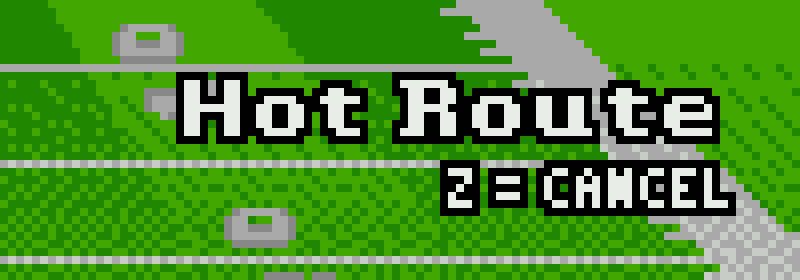
- Press Y. "Hot Route" and "Z = CANCEL" show at the top right, and every receiver shows his button, number and route.
- Press the receiver's button: A, B, C, X or Y. Only he stays marked.
- Pick his route:
| Press | Receiver or tight end | Back in the backfield |
|---|---|---|
| Up | Streak | Wheel |
| Toward his sideline | Out | Swing |
| Toward the middle | Slant | Angle |
| Down | Curl | Check-release (waits, then runs to the flat) |
| Y | Drag | Screen |
| C | Block | Block |
Z cancels at either step. Picking the receiver's hot route again puts him back on the called route. Inside the 12-yard line the streak becomes a fade, and the out and the curl break shorter. Flip Play and the flip at the line mirror hot routes; an audible or the next play clears them. Hold X to check them: the route above each receiver shows his hot route, while the diagram top right still shows the called play. While the menu is open, the other buttons and the snap do nothing.
Running
On a run, the quarterback hands the ball to the back by himself. The ball carrier runs where you point the D-pad.
| A | Dive | |
| B | Tap: burst forward, lowering a shoulder | |
| B | Hold: spin | |
| C | Hurdle | |
| C | Quarterback on an option play: pitch to the back | |
| Y | Hold: lower a shoulder again and again, with or without a direction | Elevated 6-button |
A ball carrier keeps his full speed for about 1.5 seconds, then slows down. He slows down faster when he is tired. Elevated makes for more explosive plays Elevated: ball carriers slow down less on long runs and on runs after a catch, so long gains happen more often. The game now corrects a pitch's path in the air, so pitches to fast backs no longer land behind them Elevated.
Passing
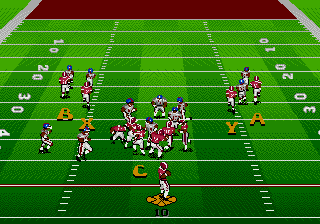
If you don't touch the D-pad after the snap, the game runs the pass play for you. Press a direction to take over the quarterback; then the throw is up to you:
- Press C to bring up the receiver icons. Before that, you can move the quarterback with the D-pad to scramble or roll out.
- Press the button of the receiver you want: A, B or C for receivers 1 to 3, and on a 6-button pad X and Y for receivers 4 and 5 Elevated 6-button. Tap for a lob, hold for a bullet.
A quarterback's RANGE rating sets how far he can throw (about 40 to 56 yards). On longer throws, a quarterback with lower INTEL is less accurate. In Elevated, long, high passes travel faster, so they spend less time in the air Elevated.
A target on the field marks where the pass is going.
While the ball is in the air:
| B | Switch to the receiver nearest the ball; steer him with the D-pad | |
| C | Jump and reach for the catch | |
| A | Dive for the ball |
Pass Catch (pause menu): with Auto, the game switches you to the receiver by itself and runs him to the ball; it's the easier mode. With Manual, you press B to take the receiver and steer him yourself.
Pass Window (pause menu): Off is the default, as in the original game: the button letters show next to the receivers on the field. On shows each receiver in a small window of his own.
Hurry-up offense
For a drive late in a half, skip the huddle. Right after the whistle:
- Hold C: your team goes straight to the line to run the same play again.
- Hold A: your team lines up to stop the clock. Press C to snap, and the quarterback spikes the ball. Don't touch the D-pad: taking over the quarterback calls off the spike.
Fatigue
Every player gets tired from what he does during a play: how far he runs, how long he is in a block, and the hits he takes Elevated. At every snap, each player recovers a quarter of his fatigue. A timeout or halftime resets every player to full energy. A tired player has lower ratings in everything except weight. To check energy, hold Z before the snap, or pick TEAM ROSTER.